• Home
  • About
  • Membership
  • Events
    • Events Calendar
    • Classes
    • Mailing List
    • Robotics
  • Sponsors
    • Sponsors
    • Donate
    • About Icarus
  • Blog

Recent Posts

  • Flameworking 101 – A Beginner’s Guide to working glass with torches
  • Happy Birthday, AMS!
  • Innovate and Create: Exciting Upcoming Classes and Events at Anchorage Makerspace
  • Protected: Show And Tell
  • DIY 3D Printer

Recent Comments

  • Steven Fett on Flameworking 101 – A Beginner’s Guide to working glass with torches
  • Paula Winfree on Flameworking 101 – A Beginner’s Guide to working glass with torches

Archives

  • February 2024
  • December 2023
  • September 2021
  • May 2020
  • March 2020
  • February 2020
  • January 2020
  • December 2019
  • April 2017
  • July 2015
  • June 2015
  • April 2015
  • January 2015
  • December 2014
  • August 2014
  • July 2014
  • April 2014
  • March 2014

Categories

  • 2D Software
  • 3d Printing
  • 3D Software
  • Activities
  • Art
  • Classes
  • CnC Router
  • First Friday
  • Flintknapping
  • Glassblowing
  • Laser
  • Maker Camp
  • Maker Events
  • News
  • Open House
  • Robotics
  • Steam Punk
  • Uncategorized
  • Woodworking

Recent Posts

  • Flameworking 101 – A Beginner’s Guide to working glass with torches
  • Happy Birthday, AMS!
  • Innovate and Create: Exciting Upcoming Classes and Events at Anchorage Makerspace
  • Protected: Show And Tell
  • DIY 3D Printer

Categories

  • 2D Software
  • 3d Printing
  • 3D Software
  • Activities
  • Art
  • Classes
  • CnC Router
  • First Friday
  • Flintknapping
  • Glassblowing
  • Laser
  • Maker Camp
  • Maker Events
  • News
  • Open House
  • Robotics
  • Steam Punk
  • Uncategorized
  • Woodworking

Archives

  • February 2024
  • December 2023
  • September 2021
  • May 2020
  • March 2020
  • February 2020
  • January 2020
  • December 2019
  • April 2017
  • July 2015
  • June 2015
  • April 2015
  • January 2015
  • December 2014
  • August 2014
  • July 2014
  • April 2014
  • March 2014

Building A Kayak With Robert Koontz — Anchorage MakerSpace

  • Andreas Tziolas
  • 2D Software , 3D Software , CnC Router , Laser , Woodworking
  • December 24, 2019
  • Anchorage MakerSpace building a kayak kayak robert koontz

Materials needed: ⅛” sheet wood & multi-length stringers, milled from 2’x8′ clear cedar board

Machines used: Computer Numerical Control (CNC) machine, laser cutter, and table saw

Software used: Fusion360

Classes necessary to replicate: CNC class, laser cutting class, and 3D modelling class


To start off any ambitious project—such as a 17-foot kayak—begin with a sketch.

Using Anchorage MakerSpace’s 3D modelling software, Fusion360, it’s possible to create a seamless design within a few hours—for Bob, it took about 8. However, as with all great makers, he had an idea, and learned along the way.

MakerSpace Tip: Only sketch half of your designs; Creo allows you to mirror this half-sketch, making for a perfectly symmetrical prototype.

Start with the curves of the hull and deck—this will act as the basic outline. Once there’s a framework to build off of, place the ribs, tail, and nose based on these existing curves.

It’s important to note that all sketches in Fusion360 begin as a line.

In order to replicate the exact kayak build, extrude (widen) the straight ribs and sweep (thicken) the curved hull and deck.

Lastly, build all the remaining parts—mostly covering pieces—as quilts, i.e. 2D solid structures placed between all parts of the existing frame.

The modeling process is easily the most time-consuming portion of any project. Once the modeling and quality assurance are finished, it’s simply a matter of outputting the .dxf files required for the CNC and laser cutters to get to work!


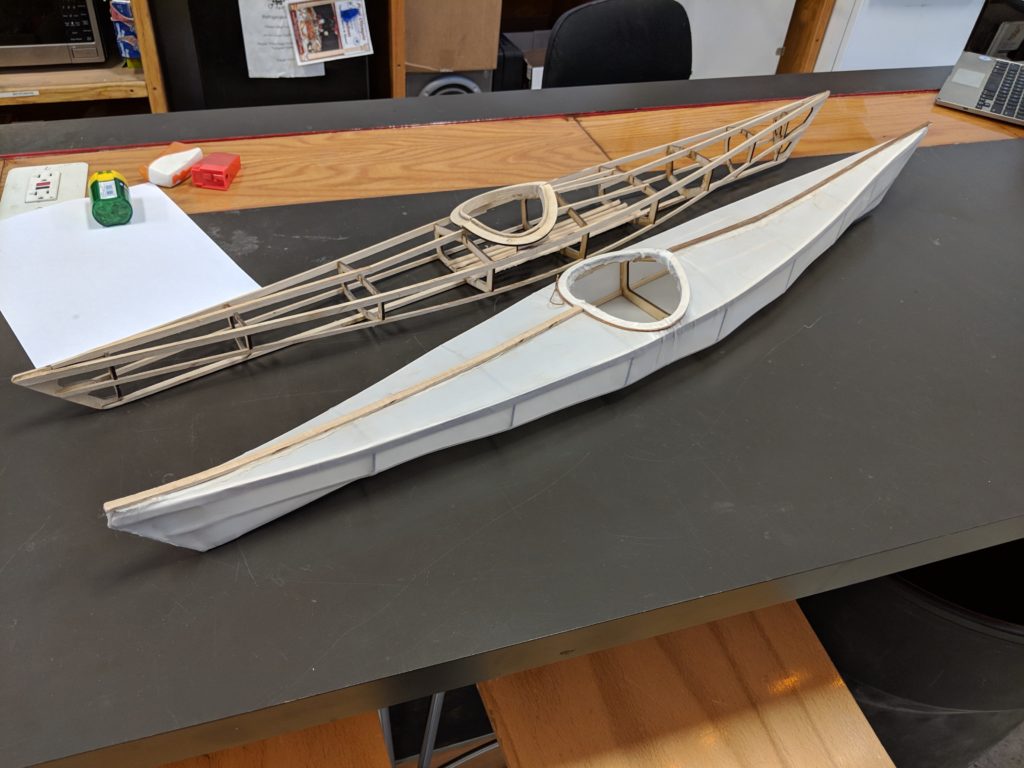
Lastly, it’s time to assemble. Using the new cuts from all three machines, put everything together with industrial-strength glue, or—if authenticity is the goal, like Bob’s—tie the parts together with sinew and cover them with a water-resistant “skin”. These added steps give the new boat a fresh, hand-crafted feel.

Assembly can be the most daunting and difficult part of the process, but expect to learn as you go. Luckily, our makers at Anchorage MakerSpace are always willing to help you out with designing, using machines, or assembly advice.


Leave a Reply Cancel reply

Your email address will not be published. Required fields are marked *

This site uses Akismet to reduce spam. Learn how your comment data is processed.

Go To Top